Perfectly Grilled Filet Mignon
This is less a recipe than a walk-thru to ensure a perfectly cooked filet. Don’t let this costly cut make you nervous. Follow these step by step directions from Grilling Companion to a filet mignon every carnivore can enjoy.
Ingredients
- Beef filet mignon steaks, at least 1.5 inches thick
- Kosher salt
- fresh ground black pepper
Directions
Step 1 - Seasoning. You paid a lot for this filet, give it some credit that it is going to hold its own in the taste department. The only seasoning I recommend to help this steak out is some fresh ground black pepper. Save the course salt for the end, some say it draws out juices. I doubt it does, but why take the chance?
Step 2 - Leave it alone! In order to reduce grilling time and ensure consistent cooking throughout the steak, we must bring the filet to room temperature. This is your easiest step, once it's seasoned just leave it on the kitchen counter. Your patience will be rewarded, trust me…just let it get into the "zone" by itself and move onto these next steps. Let it sit for at least 45 minutes. Go on, leave it alone, move on to the next step!
Step 3 - Fire it up! We are going to use direct heat to grill this delicious steak, so fire up your grill and set it and leave it at the highest temperature setting. You will know she is ready when you can't hold your hand 2 inches above the grates for more than 5 seconds (don't try and be tough, you know it hurts…). If you are a charcoal griller, set up your grill for hot, direct grilling by creating a pile 2 coals high.
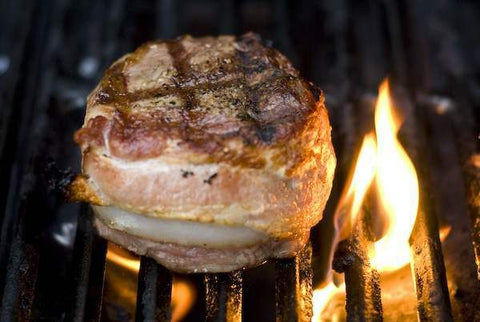
Step 4 - Sear in those juices! Ok, the moment of truth, your steak has been getting itself ready on the counter and now it's game time! Using TONGS (remember, don't EVER puncture that beautiful steak's flesh!) place your steaks on the grill and do NOTHING for at least 2 minutes. The only exception to this rule is if you have to play firefighter and splash a little water on a pesky flame. A little flare up is fine, but if a flame burns for more than 30 seconds, splash a tiny bit of water on it to put it out.
Step 5 - Grill marks! All we are doing here is creating those cool looking grill marks. After about 2 minutes (for medium-rare, a little more for Medium), lift, turn your steak 90 degrees and then set it back down for another 3 minutes (again, for medium-rare, a little more if you have to have it more done).
Step 6 - Flip once! After a total of about 5 minutes, it's time to flip that steak for the one and only time. Gently lift, flip and set it back down in the same spot and leave it alone again for about 2 more minutes.
Step 7 - Rotate again. This is getting easy, you know what is next. Repeat Step 5 on this side now!
Step 8 - Check it. Now it is time to check your steak for the perfect doneness. The very best way to ensure proper doneness is by using an instant-read meat thermometer. Insert the thermometer into the side of the steak to measure the very center and then check out Grilling Companion's grilling tips if you need a temperature chart to determine your preferred doneness.
Step 9 - Remove and rest. Take it off the grill now, you are done with the heat section! Remove it and set it on a plate or platter and leave it alone.
Your beautiful filet has been through a traumatic experience. It went from refrigerated to room temperature to a HOT grill. This plays havoc on the juices inside so we need to give it some time to collect itself. Now that it is on the platter, let it rest again for 2 - 3 minutes (which will now seem like 2 hours!). This allows the juices to re-distribute, so they don't all run out when you slice into that beautiful hunk of beef.
Step 10 - Enjoy! Go ahead, enjoy it!